文章目录
- 前言
- 1、环境安装
- 2.1安装torch相关库
- 2.2 获取yolov8最新版本,并安装依赖
- 3. 如何使用模型用于各种CV任务
- 方式一:命令行形式
- 方式二:python代码形式示例
- 3.1 目标检测任务实现
- 代码
- 运行结果
- 检测视频代码
- 3.2 分割任务实现
- 代码
- 运行效果
- 分割视频代码
- 3.3 追踪任务
- 代码
- 3.4 姿态检测任务
- 代码
- 运行结果
- 姿态检测视频代码
前言
YOLOv8是Ultralytics的最新版本YOLO。作为最先进的 SOTA 模型,YOLOv8 建立在以前版本成功的基础上,引入了新功能和改进,以增强性能、灵活性和效率。YOLOv8 支持全方位的视觉 AI 任务,包括检测、分割、姿势估计、跟踪和分类。这种多功能性使用户能够在不同的应用程序和域中利用YOLOv8的功能。模型中只需要设定不同的训练模型,就可以得到不同的检测结果
1、环境安装
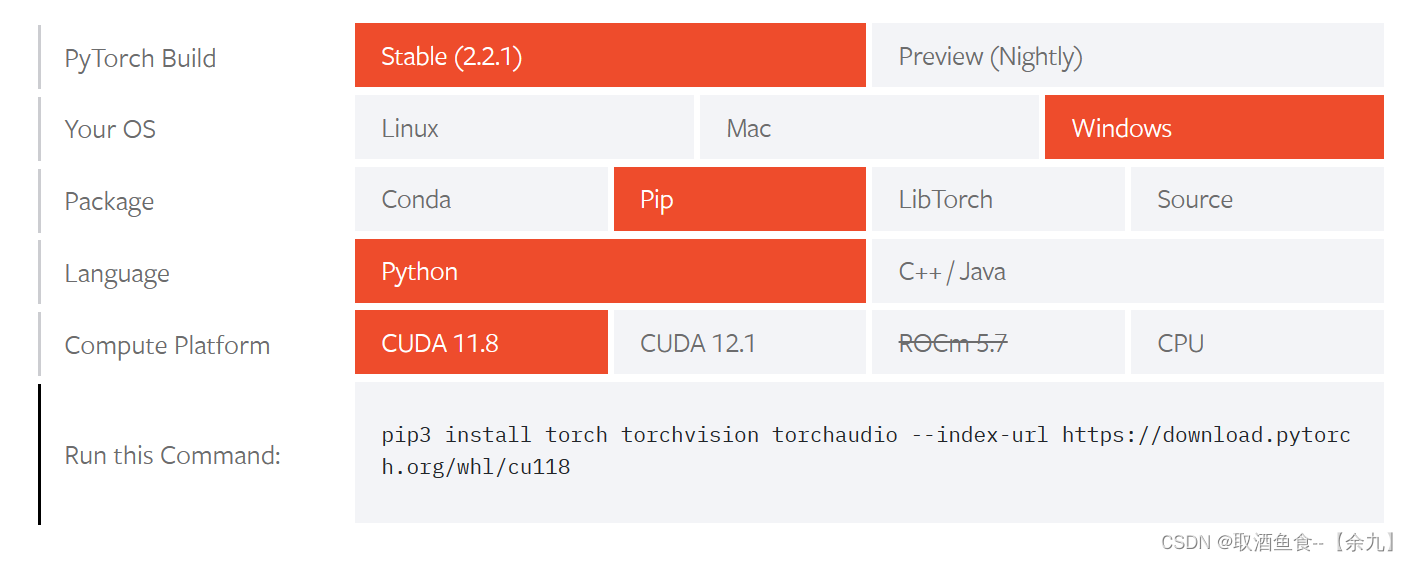
2.1安装torch相关库
官网地址:https://pytorch.org/get-started/locally
安装命令:(根据自己电脑选型)
pip3 install torch torchvision torchaudio --index-url https://download.pytorch.org/whl/cu118
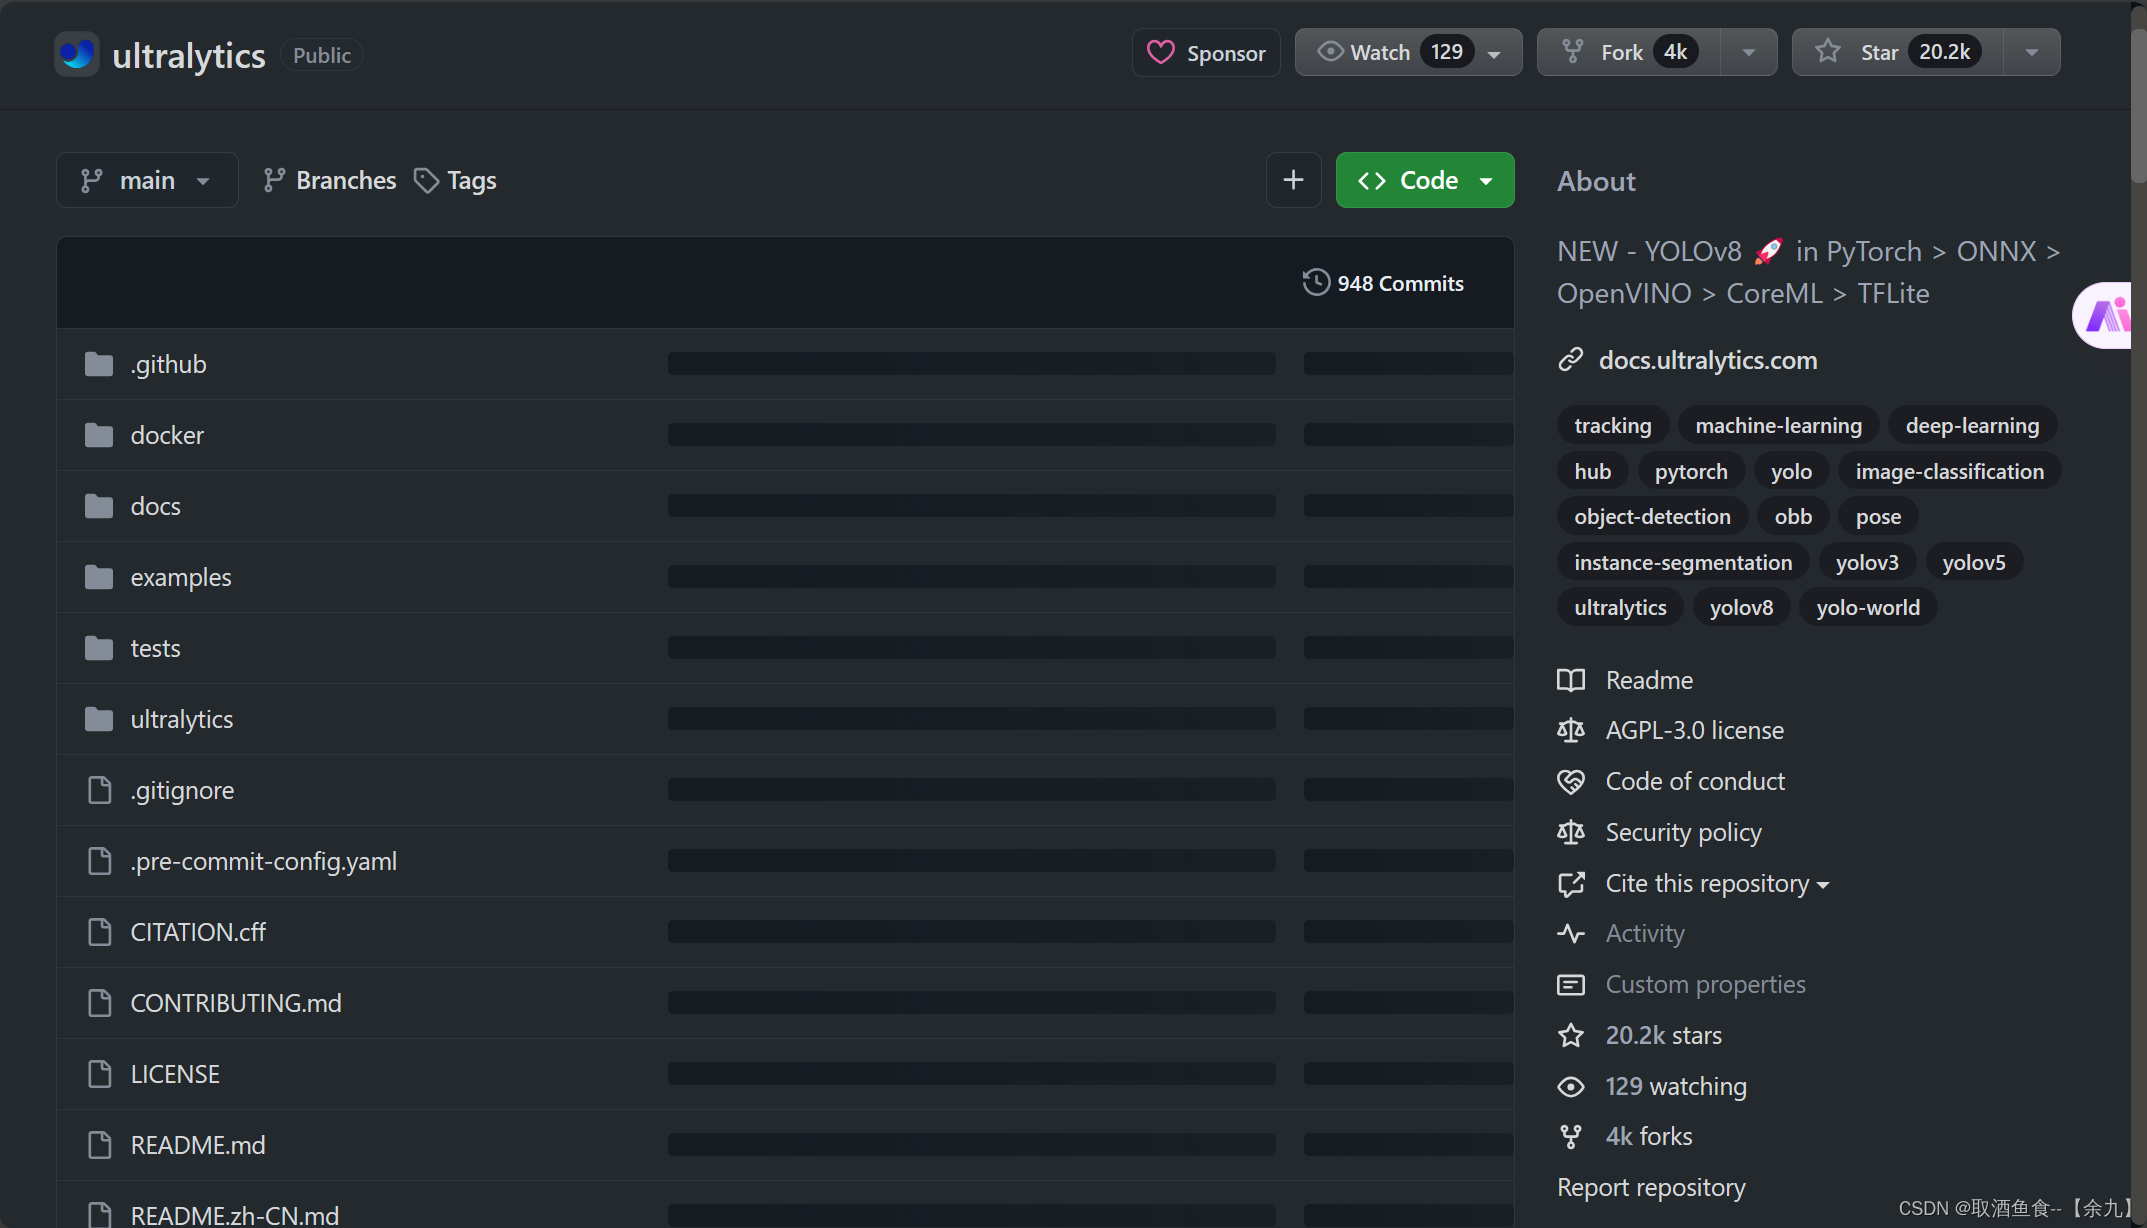
2.2 获取yolov8最新版本,并安装依赖
github地址: https://github.com/ultralytics/ultralytics
通过克隆仓库到本地来获得yolov8最新版本。
安装依赖环境
pip install ultralytics
3. 如何使用模型用于各种CV任务
安装好yolov8需要的运行环境之后,就可以直接使用模型了,目前,该模型可以直接用于检测、分割、姿势估计、跟踪和分类这5类检测任务。
支持两种运行方式:
方式一:命令行形式
yolo TASK MODE ARGS

举例: yolo detect predict model=yolov8n.pt source='test.jpg'
表示对图片test.jpg进行目标检测
参数说明:
TASK (optional) 表示模型任务类型,可以从列表 [detect, segment, classify, pose]选一个.
分别代表检测、分割、分类、姿态检测任务 MODE (required) 表示模型需要执行的操作,可以从列表 [train, val,
predict, export, track, benchmark]选一个,分别代表训练、验证、预测、模型转换、追踪、基准模型评估 ARGS
(optional) 表示其他的一些参数设置,后面详细说明
方式二:python代码形式示例
from ultralytics import YOLO

# 加载预训练模型,
model = YOLO('yolov8n.pt',task='detect')
# yolov8n.pt表示预训练模型
# task代表需要执行的任务:detect, segment, classify, pose
# 使用模型进行指定任务
results = model(ARGS)
3.1 目标检测任务实现
代码
from ultralytics import YOLO
import cv2
# 加载预训练模型
model = YOLO("yolov8n.pt", task='detect')
# model = YOLO("yolov8n.pt") task参数也可以不填写,它会根据模型去识别相应任务类别
# 检测图片
results = model("./ultralytics/assets/bus.jpg")
res = results[0].plot()
cv2.imshow("YOLOv8 Inference", res)
cv2.waitKey(0)
运行结果

检测视频代码
import cv2
from ultralytics import YOLO

# Load the YOLOv8 model
model = YOLO('yolov8n.pt')
print('111')
# Open the video file
video_path = "1.mp4"
cap = cv2.VideoCapture(video_path)

# Loop through the video frames
while cap.isOpened():
    # Read a frame from the video
    success, frame = cap.read()

    if success:
        # Run YOLOv8 inference on the frame
        results = model(frame)

        # Visualize the results on the frame
        annotated_frame = results[0].plot()

        # Display the annotated frame
        cv2.imshow("YOLOv8 Inference", annotated_frame)

        # Break the loop if 'q' is pressed
        if cv2.waitKey(1) & 0xFF == ord("q"):
            break
    else:
        # Break the loop if the end of the video is reached
        break

# Release the video capture object and close the display window
cap.release()
cv2.destroyAllWindows()
3.2 分割任务实现
代码
from ultralytics import YOLO
import cv2
# Load a model
model = YOLO('yolov8n-seg.pt')
# Predict with the model
results = model('./ultralytics/assets/bus.jpg')  # predict on an image
res = results[0].plot(boxes=False) #boxes=False表示不展示预测框,True表示同时展示预测框
# Display the annotated frame
cv2.imshow("YOLOv8 Inference", res)
cv2.waitKey(0)
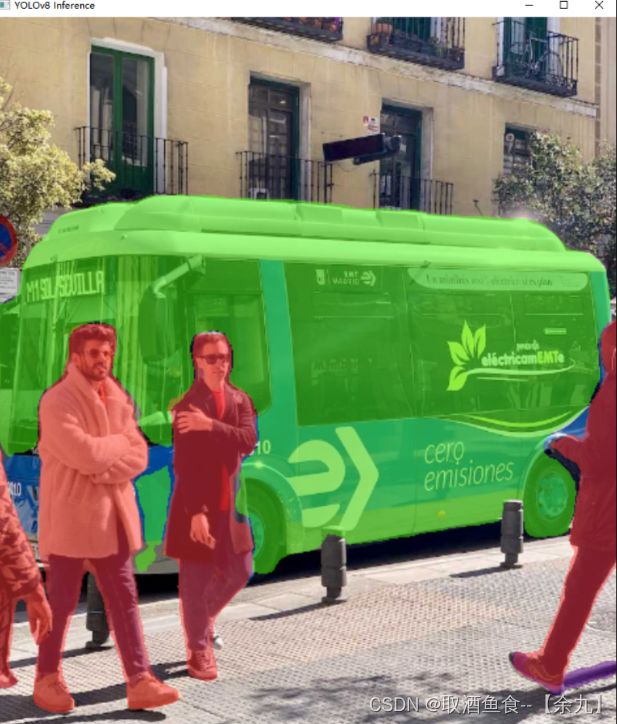
运行效果
分割视频代码
import cv2
from ultralytics import YOLO

# Load the YOLOv8 model
model = YOLO('yolov8n-seg.pt', task='segment')
# Open the video file
video_path = "1.mp4"
cap = cv2.VideoCapture(video_path)

# Loop through the video frames
while cap.isOpened():
    # Read a frame from the video
    success, frame = cap.read()

    if success:
        # Run YOLOv8 inference on the frame
        results = model(frame)

        # Visualize the results on the frame
        annotated_frame = results[0].plot()
        # annotated_frame = results[0].plot(boxes=False)不显示预测框

        # Display the annotated frame
        cv2.imshow("YOLOv8 Inference", annotated_frame)

        # Break the loop if 'q' is pressed
        if cv2.waitKey(1) & 0xFF == ord("q"):
            break
    else:
        # Break the loop if the end of the video is reached
        break

# Release the video capture object and close the display window
cap.release()
cv2.destroyAllWindows()

3.3 追踪任务
代码如下:【与目标检测不同的是,每个物体有一个ID。】
代码
from ultralytics import YOLO

# Load a model
model = YOLO('yolov8n.pt',task='detect')
# model = YOLO('yolov8n-seg.pt')

# Track with the model
results = model.track(source="1.mp4", show=True)
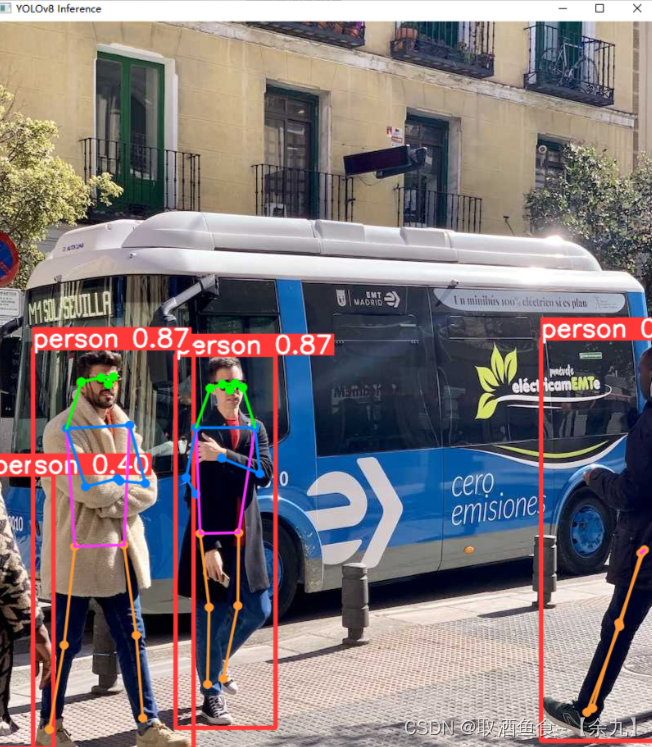
3.4 姿态检测任务
代码
from ultralytics import YOLO
import cv2
# Load a model
model = YOLO('yolov8n-pose.pt')  # load a pretrained model (recommended for training)
results = model('./ultralytics/assets/bus.jpg')
res = results[0].plot()
cv2.imshow("YOLOv8 Inference", res)
cv2.waitKey(0)
运行结果
姿态检测视频代码
import cv2
from ultralytics import YOLO

# Load the YOLOv8 model
model = YOLO('yolov8n-pose.pt', task='pose')
# Open the video file
video_path = "1.mp4"
cap = cv2.VideoCapture(video_path)

# Loop through the video frames
while cap.isOpened():
    # Read a frame from the video
    success, frame = cap.read()

    if success:
        # Run YOLOv8 inference on the frame
        results = model(frame)

        # Visualize the results on the frame
        annotated_frame = results[0].plot()

        # Display the annotated frame
        cv2.imshow("YOLOv8 Inference", annotated_frame)

        # Break the loop if 'q' is pressed
        if cv2.waitKey(1) & 0xFF == ord("q"):
            break
    else:
        # Break the loop if the end of the video is reached
        break

# Release the video capture object and close the display window
cap.release()
cv2.destroyAllWindows()