前言
其实年初的时候,我也跟着别人的源码,用 Tensoflow 实现过扑克牌的目标检测。虽然也通过博文的方式记录了,但是那个项目使用的 TF 版本比较旧,自身对 TF 并不熟。后期如果说要升级或修改估计够呛,知道最近看到 YOLO 对目标检测的实现方法,发现这个更方便快捷。
于是决定用 YOLOv5.6 来重新实现一下扑克牌的点数识别,本文章主要是个人记录,也面向刚刚接触 YOLO 的同学阅读。所以以下会从数据标注,归一化处理到模型训练的实战内容,也包括各种踩坑经历和处理方法,最后对 detect.py 的重写,完成目标对象的坐标和识别标记输出。

YOLO 简介
YOLO(You Only Look Once)是一种基于深度神经网络的对象识别和定位算法,其最大的特点是运行速度很快,可以用于实时系统。现在 YOLO 已经发展到 v8 版本,每个版本都在原有基础上改进演化的。选择 V5 是因为后面几个新版发行并不久,v5 相关资料和文章较多,踩坑起来也好搜索。其中每个版本里又有按场景划分几个特定场景版本,比如:
- YOLOv5s:最小版本,速度最快,但检测性能最低。
- YOLOv5m:中等版本,速度比 s 慢一些,但检测性能更好。
- YOLOv5l:大型版本,速度比 m 慢,但检测性能更好。
- YOLOv5x:最大版本,速度最慢,但是检测性能最好。
- YOLOv5n6:中等版本,速度比 m 快一些,但检测性能更好。
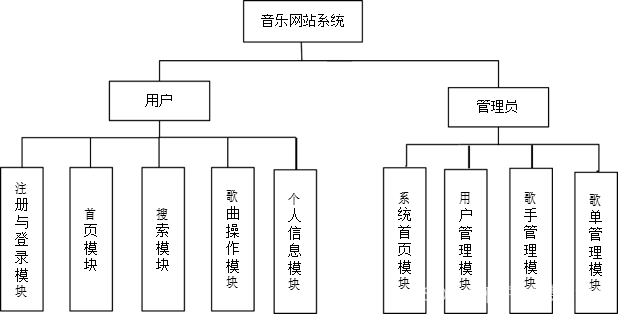
总之,根据具体需求和应用场景,可以选择合适的 YOLOv5 版本以满足性能、速度和准确性的要求,我这里以 YOLOv5s 为例。然后在项目开始前呢,我们可以先去 https://github.com/ultralytics/yolov5 下载 demo 代码和权重文件,比如 yolov5s.pt,下载完后就要准备数据集,也就是标记的图片。
数据集
图片的话,看你要识别的目标是啥,可以拍摄整理或去网上下载。为了让训练的模型稍微有点准确,最好准备一两百张,我这里就直接从原来 TF 项目那里拿过来。一共有 363 张扑克牌图片并且都已经用 VOC 格式标注好了,不过为了大家了解,这里还是会介绍如何标注,以及标注工具 labelImg 的基本使用。
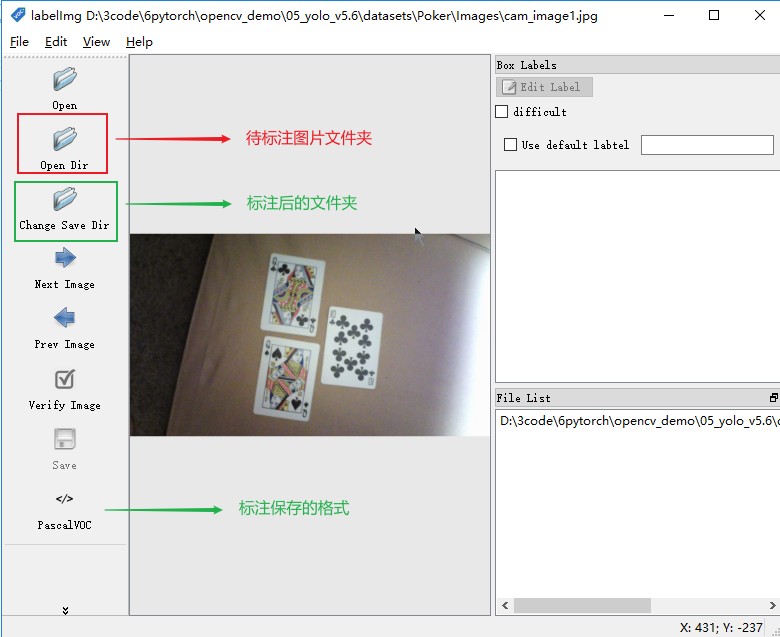
LabelImg 使用
操作界面
快捷使用
1、W 是进行标注
2、A 是切换到上一张图片
3、D 是切换到下一张图片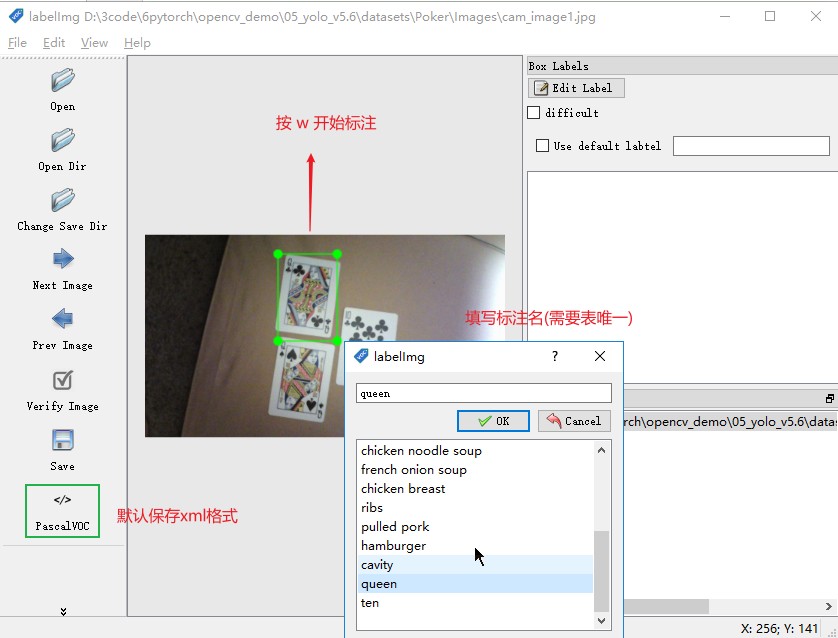
LabelImg 保存格式
1. PascalVOC 默认,xml格式
2. YOLO text可以直接拿来训练不用转换
实战
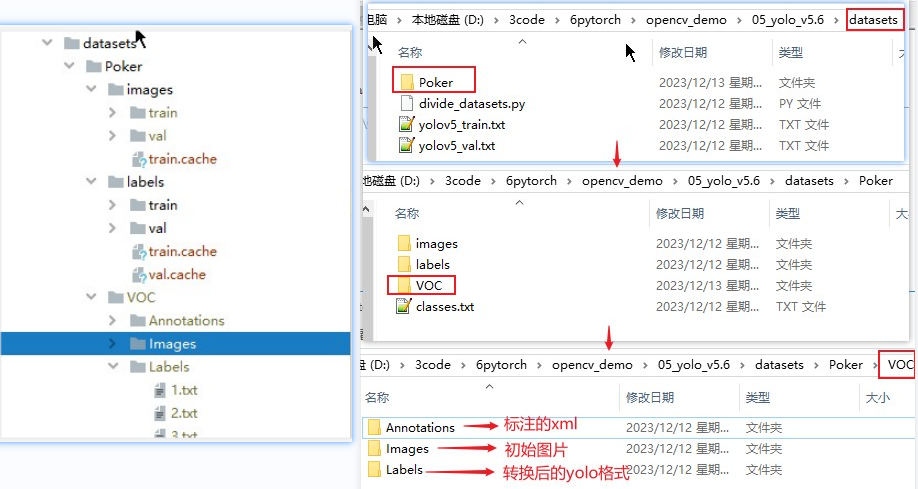
创建目录
在根目录下新建 datasets 用于放置训练的数据集,由于用同一 yolo 可以创建多个检测目标,所以在 datasets 先创建一个项目名目录。然后再在项目名下可创建 VOC 和 YOLO 两种格式的目录,虽然 labelImg 标注后可以直接保存 YOLO 格式也就是归一化后的 text,但是毕竟三百多张图的标注,我这里依然使用以前 TF 的 VOC 的标注数据。如果需要这些数据集的,可以留言,到时我再放在评论区。
依赖安装
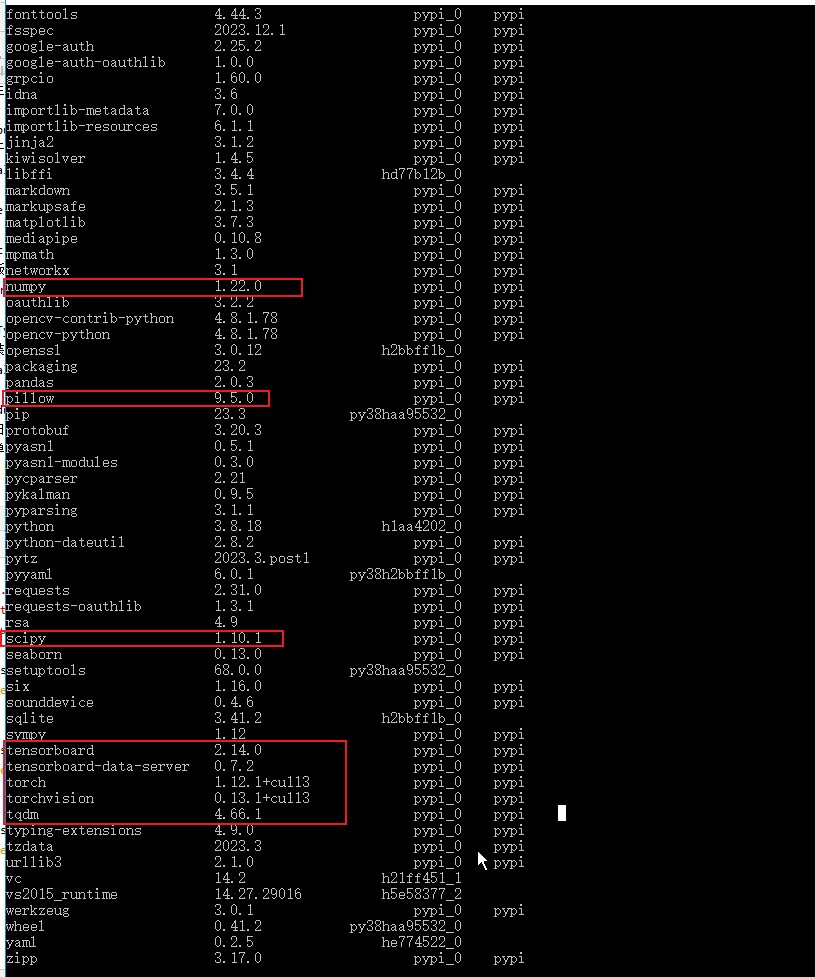
依赖直接安装项目根目录下的 requirements.txt 就可以,但是要严格按照里面的版本。因为我用的是以前 conda 创建的环境,可以包都装过,所以一开始就看到已经有的就没装,导致后面运行的时候很多问题都是包的版本问题。所以最好的方法就是用 conda 创建一个新环境,然后直接 pip install -r requirements.txt 是最好的。
归一化和数据集划分
如果 LabelImg 标注后保存的是 YOLO 格式,归一化过程就可以略过了。前面我也说了是用的以前扑克牌的 VOC 格式,所以需要对 xml 里节点数据抽取坐标和标记然后转换成 yolo 的 txt 格式。以下代码是我从其他博主那薅过来的,主要就是归一化和划分训练数据集和校验数据集。特别主要是 classes 部分要修改成自己的目标分类,其他的可以不用改动,当然只是划分的话可以适当删减。
import xml.etree.ElementTree as ET
import pickle
import os
from os import listdir, getcwd
from os.path import join
import random
from shutil import copyfile

classes = ["nine", "ten", "jack", "queen", "king", "ace"]
TRAIN_RATIO = 80


def clear_hidden_files(path):
    dir_list = os.listdir(path)
    abspath = ""
    for i in dir_list:
        abspath = os.path.join(os.path.abspath(path), i)
    if os.path.isfile(abspath):
        if i.startswith("._"):
            os.remove(abspath)
    else:
        clear_hidden_files(abspath)


def convert(size, box):
    dw = 1. / size[0]
    dh = 1. / size[1]
    x = (box[0] + box[1]) / 2.0
    y = (box[2] + box[3]) / 2.0
    w = box[1] - box[0]
    h = box[3] - box[2]
    x = x * dw
    w = w * dw
    y = y * dh
    h = h * dh
    return (x, y, w, h)


def convert_annotation(image_id):
    in_file = open('Poker/VOC/Annotations/%s.xml' % image_id)
    out_file = open('Poker/VOC/Labels/%s.txt' % image_id, 'w')

    tree = ET.parse(in_file)
    root = tree.getroot()
    size = root.find('size')
    w = int(size.find('width').text)
    h = int(size.find('height').text)

    for obj in root.iter('object'):
        difficult = obj.find('difficult').text
        cls = obj.find('name').text
        if cls not in classes or int(difficult) == 1:
            continue

        cls_id = classes.index(cls)
        xmlbox = obj.find('bndbox')
        b = (float(xmlbox.find('xmin').text), float(xmlbox.find('xmax').text), float(xmlbox.find('ymin').text),
             float(xmlbox.find('ymax').text))
        bb = convert((w, h), b)

        out_file.write(str(cls_id) + " " + " ".join([str(a) for a in bb]) + '\n')

    in_file.close()
    out_file.close()

# 开始执行 ##
wd = os.getcwd()
data_base_dir = os.path.join(wd, "Poker/")
if not os.path.isdir(data_base_dir):
    os.mkdir(data_base_dir)

work_sapce_dir = os.path.join(data_base_dir, "VOC/")
if not os.path.isdir(work_sapce_dir):
    os.mkdir(work_sapce_dir)

annotation_dir = os.path.join(work_sapce_dir, "Annotations/")
if not os.path.isdir(annotation_dir):
    os.mkdir(annotation_dir)

image_dir = os.path.join(work_sapce_dir, "Images/")
if not os.path.isdir(image_dir):
    os.mkdir(image_dir)

yolo_labels_dir = os.path.join(work_sapce_dir, "Labels/")
if not os.path.isdir(yolo_labels_dir):
    os.mkdir(yolo_labels_dir)

yolov5_images_dir = os.path.join(data_base_dir, "images/")
if not os.path.isdir(yolov5_images_dir):
    os.mkdir(yolov5_images_dir)

yolov5_labels_dir = os.path.join(data_base_dir, "labels/")
if not os.path.isdir(yolov5_labels_dir):
    os.mkdir(yolov5_labels_dir)

yolov5_images_train_dir = os.path.join(yolov5_images_dir, "train/")
if not os.path.isdir(yolov5_images_train_dir):
    os.mkdir(yolov5_images_train_dir)

yolov5_images_test_dir = os.path.join(yolov5_images_dir, "val/")
if not os.path.isdir(yolov5_images_test_dir):
    os.mkdir(yolov5_images_test_dir)

yolov5_labels_train_dir = os.path.join(yolov5_labels_dir, "train/")
if not os.path.isdir(yolov5_labels_train_dir):
    os.mkdir(yolov5_labels_train_dir)

yolov5_labels_test_dir = os.path.join(yolov5_labels_dir, "val/")
if not os.path.isdir(yolov5_labels_test_dir):
    os.mkdir(yolov5_labels_test_dir)

train_file = open(os.path.join(wd, "yolov5_train.txt"), 'w')
test_file = open(os.path.join(wd, "yolov5_val.txt"), 'w')
train_file.close()
test_file.close()

train_file = open(os.path.join(wd, "yolov5_train.txt"), 'a')
test_file = open(os.path.join(wd, "yolov5_val.txt"), 'a')

list_imgs = os.listdir(image_dir)  # list image files
prob = random.randint(1, 100)
print("Probability: %d" % prob)

for i in range(0, len(list_imgs)):
    path = os.path.join(image_dir, list_imgs[i])
    if os.path.isfile(path):
        image_path = image_dir + list_imgs[i]
        voc_path = list_imgs[i]
        (nameWithoutExtention, extention) = os.path.splitext(os.path.basename(image_path))
        (voc_nameWithoutExtention, voc_extention) = os.path.splitext(os.path.basename(voc_path))
        annotation_name = nameWithoutExtention + '.xml'
        annotation_path = os.path.join(annotation_dir, annotation_name)

        label_name = nameWithoutExtention + '.txt'
        label_path = os.path.join(yolo_labels_dir, label_name)

    prob = random.randint(1, 100)
    print("Probability: %d" % prob)

    if (prob < TRAIN_RATIO):  # train dataset
        if os.path.exists(annotation_path):
            train_file.write(image_path + '\n')
            convert_annotation(nameWithoutExtention)  # convert label
            copyfile(image_path, yolov5_images_train_dir + voc_path)
            copyfile(label_path, yolov5_labels_train_dir + label_name)
    else:  # test dataset
        if os.path.exists(annotation_path):
            test_file.write(image_path + '\n')
            convert_annotation(nameWithoutExtention)  # convert label
            copyfile(image_path, yolov5_images_test_dir + voc_path)
            copyfile(label_path, yolov5_labels_test_dir + label_name)

train_file.close()
test_file.close()
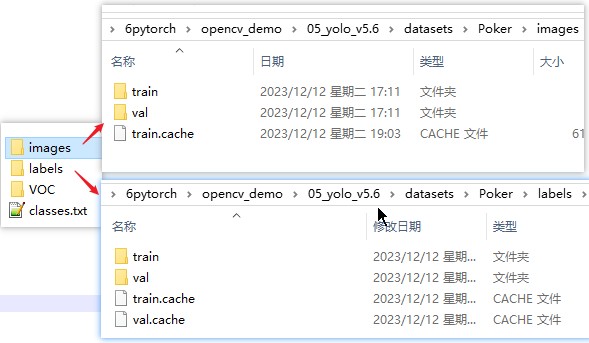
上面代码放在哪个位置看你自己,由于有些目录是相对位置,所以如果不想改也跟我一样放在 datasets 中。执行完上面代码后会在 datasets 下生成 images 和 labels 两个目录,而且特别注意的是这两个目录名最好就是也是这样,比如在上面代码改了生成名,在后面训练的时候,会提示找不到 labels 目录。当然也可以修改 YOLO 提供源码的 dataset.py,看个人选择,而且 images 里的 train 和 val 需要配置到 data 的 yaml 中,这个马上就会说。
配置
数据集配置
该默认文件位于项目的 data/coco128.yaml,现在我们进行划分了数据集和自己的目标种类,当然要对其进行重新配置。最好的方法就是复制一份 coco128 然后修改名称,如下面 coco128_pocker.yaml 是我的配置示例。
train: D:\3code\6pytorch\opencv_demo\05_yolo_v5.6\datasets\Poker\images\train  # train images (relative to 'path') 128 images
val: D:\3code\6pytorch\opencv_demo\05_yolo_v5.6\datasets\Poker\images\val  # val images (relative to 'path') 128 images

# Classes
nc: 6  # number of classes
names: ["nine", "ten", "jack", "queen", "king", "ace"]  # class names

# Download script/URL (optional)
download: https://ultralytics.com/assets/coco128.zip
模型配置
该默认文件位于项目的 model 下,然后选择自己的场景,如我用的是 v5s 同样就复制一份重命名。这个文件主要是定义模型的基本机构和参数,比如分类数目 nc,模型深度倍数 depth_multiple,每层通道数倍数 width_multiple,以及目标框的大小和比例的 anchors。在刚使用 YOLO 的话,我们就改个 nc 就可以,后面再研究这些参数的用法,下面是 yolov5s_pocker.yaml 的示例。
# Parameters
nc: 6  # number of classes
depth_multiple: 0.33  # model depth multiple
width_multiple: 0.50  # layer channel multiple
anchors:
  - [10,13, 16,30, 33,23]  # P3/8
  - [30,61, 62,45, 59,119]  # P4/16
  - [116,90, 156,198, 373,326]  # P5/32

# YOLOv5 v6.0 backbone
backbone:
  # [from, number, module, args]
  [[-1, 1, Conv, [64, 6, 2, 2]],  # 0-P1/2
   [-1, 1, Conv, [128, 3, 2]],  # 1-P2/4
   [-1, 3, C3, [128]],
   [-1, 1, Conv, [256, 3, 2]],  # 3-P3/8
   [-1, 6, C3, [256]],
   [-1, 1, Conv, [512, 3, 2]],  # 5-P4/16
   [-1, 9, C3, [512]],
   [-1, 1, Conv, [1024, 3, 2]],  # 7-P5/32
   [-1, 3, C3, [1024]],
   [-1, 1, SPPF, [1024, 5]],  # 9
  ]

# YOLOv5 v6.0 head
head:
  [[-1, 1, Conv, [512, 1, 1]],
   [-1, 1, nn.Upsample, [None, 2, 'nearest']],
   [[-1, 6], 1, Concat, [1]],  # cat backbone P4
   [-1, 3, C3, [512, False]],  # 13

   [-1, 1, Conv, [256, 1, 1]],
   [-1, 1, nn.Upsample, [None, 2, 'nearest']],
   [[-1, 4], 1, Concat, [1]],  # cat backbone P3
   [-1, 3, C3, [256, False]],  # 17 (P3/8-small)

   [-1, 1, Conv, [256, 3, 2]],
   [[-1, 14], 1, Concat, [1]],  # cat head P4
   [-1, 3, C3, [512, False]],  # 20 (P4/16-medium)

   [-1, 1, Conv, [512, 3, 2]],
   [[-1, 10], 1, Concat, [1]],  # cat head P5
   [-1, 3, C3, [1024, False]],  # 23 (P5/32-large)

   [[17, 20, 23], 1, Detect, [nc, anchors]],  # Detect(P3, P4, P5)
  ]
权重文件
这个就是我们从 yolo 开源那里下载的 yolov5s.pt,这里面有 80 个类目的检测,在基础识别时候可以直接用它。而训练自己的目标也需要基于他的权重再进行训练,所以可以在项目中创建一个 weights,然后再将 yolov5s.pt 放到其中。

训练
基础预测
在训练目标模型前,可以先试试以前的基础检测,这里我们可以随便拿一张图放到 data/images 下,然后执行下面命令,根目录下会生成 runs,而 runs 下的 detect 会根据每次执行的次数生成不同次的标注结果。
python detect.py --weights weights/yolov5s.pt --source data/images/zidane.jpg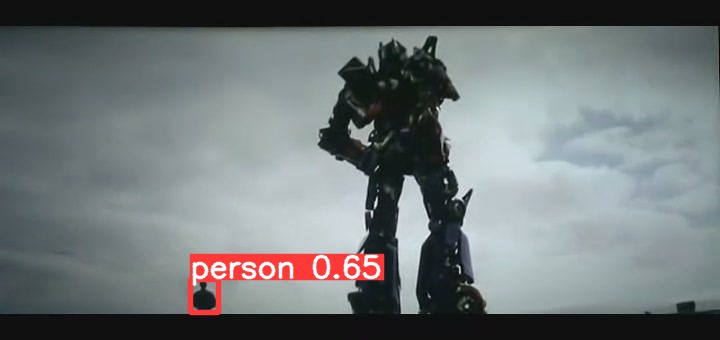
指令介绍
source: 需要进行检测的图片或视频的文件位置
weigths: 指的是训练好的网络模型,用来初始化网络权重
cfg:为configuration的缩写,指的是网络结构,一般对应models文件夹下的xxx.yaml文件
data:训练数据路径,一般为data文件夹下的xxx.yaml文件
epochs:设置训练的轮数(自己电脑上一般建议先小一点,测试一下,看跑一轮要多久)
batch-size:每次输出给神经网络的图片数,(需要根据自己电脑性能进行调整)
img-size:用于分别设置训练集和测试集的大小。两个数字前者为训练集大小,后者为测试集大小
image-weights:测试过程中,图像的那些测试地方不太好,对这些不太好的地方加权重
device:训练网络的设备cpu还是gpu
multi-scale:训练过程中对图片进行尺度变换
workers: 多线程训练
label-smoothing: 对标签进行平滑处理,防止过拟合
开始训练
以下是我踩过坑后执行的命令,因为当时我用 CPU 训练一轮要 7 分钟就改成了 GPU,加了 --device 0 后速度快了 4 倍。batch-size 为 2,这么小是因为我的显卡 750Ti 显存只有 2G,就暂时用了这个数值。而加了 --workers 0,也是因为有坑,这个后面再说。训练完成后,会在根目录的 runs/train 下生成每次运行的权重文件和损失准确示例图等,其中 weights 下的 best.pt 和 last.pt,分别表示本轮训练最好的权重和最新的权重。
python train.py --weights weights/yolov5s.pt --cfg models/yolov5s_pocker.yaml --data data/coco128_pocker.yaml --epochs 1 --batch-size 2 --multi-scale --device 0 --workers 0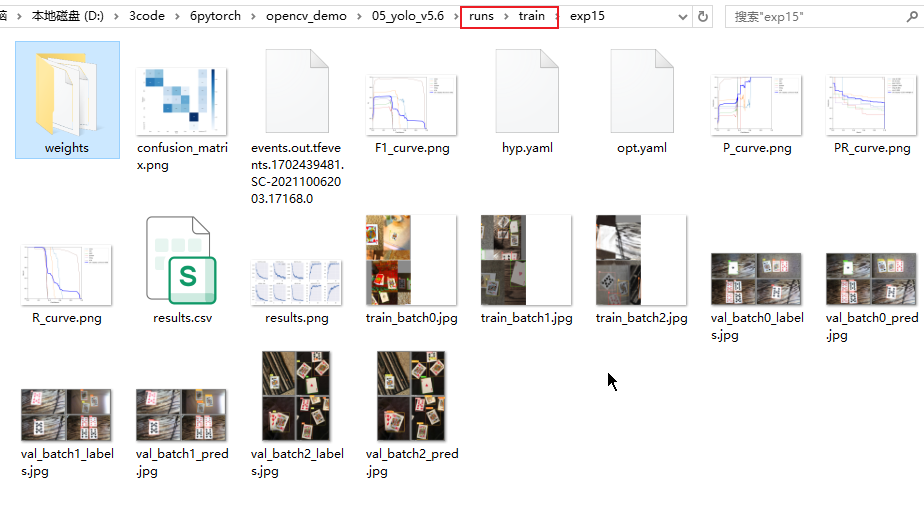

开始检测
训练完成后,我们可以把本轮的 best.pt 放到根目录的 weights 下,以下是不同检测方式的命令,可以分别都试一下。
1. 图片
python detect.py  --weights weights/best.pt --data data/coco128_pocker.yaml --source data/images/cam_image16.jpg
2. 视频
python detect.py  --weights weights/best.pt --data data/coco128_pocker.yaml --source data/images/test.mov
3. 使用cuda测试
python detect.py --device 0 --weights weights/best.pt --data data/coco128_pocker.yaml --source data/images/IMG_2681.JPG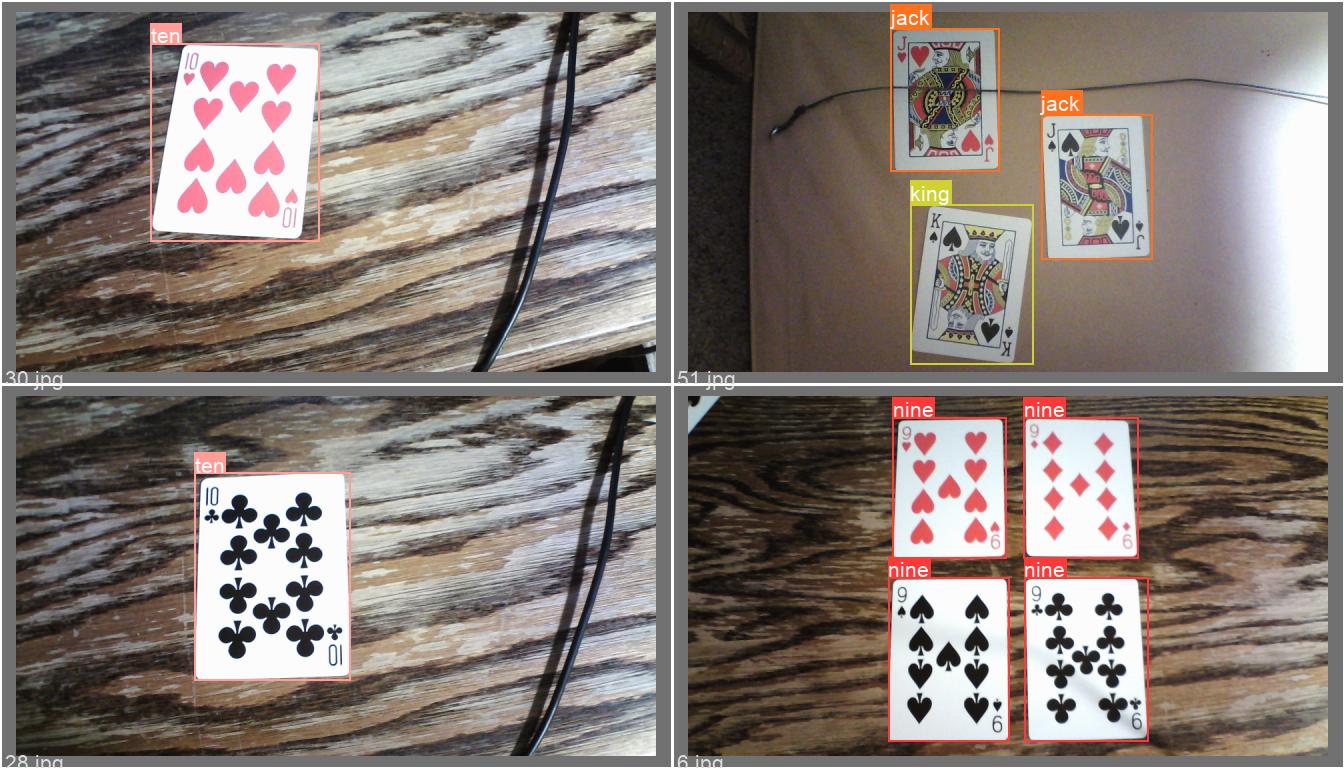
detect.py 重写
因为在实际项目中,我们对图片和视频的目标检测,更多的可能是通过前端传递过来的图片或视频,模型给出的是预测的类目名称和目标的位置,而不是直接生成标注的图片和视频。所以我对 demo 提供的 detect 进行了简单的修改,修改结果就是前面放出的图片,不过还是采用命令方式,当然也可以直接改成接口,最后就是如果需要代码的可以评论区留言哈。
import warnings

warnings.filterwarnings("ignore")
import argparse
from utils.datasets import *
from utils.torch_utils import *
from utils.augmentations import *
from utils.general import *
from models.common import DetectMultiBackend
from utils.plots import Annotator, colors, save_one_box
import time
import cv2
import torch
import random
import numpy as np


def detect(save_img=False):
    # 解析配置参数
    source, weights, data, imgsz = opt.source, opt.weights, opt.data, opt.img_size

    # 初始化 模型推理硬件
    device = select_device(opt.device)
    model = DetectMultiBackend(weights, device=device, dnn=False, data=data)
    stride, names, pt, jit, onnx, engine = model.stride, model.names, model.pt, model.jit, model.onnx, model.engine
    imgsz = check_img_size(imgsz, s=stride)

    dataset = LoadImages(source, img_size=imgsz, stride=stride, auto=pt)

    dt, seen = [0.0, 0.0, 0.0], 0
    for path, im, im0s, vid_cap, s in dataset:
        t1 = time_sync()
        # im = torch.from_numpy(im).to(device)
        im = torch.from_numpy(im.astype(np.float32)).to(device)
        im /= 255  # 0 - 255 to 0.0 - 1.0
        if len(im.shape) == 3:
            im = im[None]  # expand for batch dim
        t2 = time_sync()
        dt[0] += t2 - t1

        dt[0] += t2 - t1

        # Inference
        # visualize = increment_path(save_dir / Path(path).stem, mkdir=True) if visualize else False
        pred = model(im)
        t3 = time_sync()
        dt[1] += t3 - t2

        # NMS
        pred = non_max_suppression(pred, 0.25, 0.45, None, False, max_det=1000)
        dt[2] += time_sync() - t3

        for i, det in enumerate(pred):
            p, s, im0 = source, '', im0s

            # print('im0_shape:', im0.shape)

            s += '%gx%g ' % im.shape[2:]  # print string
            gn = torch.tensor(im0.shape)[[1, 0, 1, 0]]  #  normalization gain whwh

            if det is not None and len(det):
                # 推理的图像分辨率转为原图分辨率:Rescale boxes from img_size to im0 size
                det[:, :4] = scale_coords(im.shape[2:], det[:, :4], im0.shape).round()

                # Print results
                for c in det[:, -1].unique():
                    n = (det[:, -1] == c).sum()  # detections per class
                    s += '%g %ss, ' % (n, names[int(c)])  # add to string

                # Write results
                output_dict_ = []
                for *xyxy, conf, cls in det:
                    x1, y1, x2, y2 = xyxy
                    output_dict_.append((float(x1), float(y1), float(x2), float(y2)))
                    label = '%s %.2f' % (names[int(cls)], conf)
                    print("---------------------------------------------------------------------")
                    print("尺寸:", im0.shape)
                    print("坐标:", (float(x1), float(y1), float(x2), float(y2)))
                    print("标识:", label)
                # print("output_dict_ : ", output_dict_)


if __name__ == '__main__':
    parser = argparse.ArgumentParser()
    parser.add_argument('--weights', type=str, default='weights/yolov5s.pt', help='model.pt path')
    parser.add_argument('--data', type=str, default='data/coco128_pocker.yaml', help='dataset.yaml path')
    parser.add_argument('--source', type=str, default="./video/1.mp4", help='source')  # file/folder, 0 for webcam
    parser.add_argument('--img-size', type=int, default=640, help='inference size (pixels)')
    parser.add_argument('--conf-thres', type=float, default=0.31, help='object confidence threshold')
    parser.add_argument('--iou-thres', type=float, default=0.45, help='IOU threshold for NMS')
    parser.add_argument('--fourcc', type=str, default='mp4v', help='output video codec (verify ffmpeg support)')
    parser.add_argument('--device', default='', help='cuda device, i.e. 0 or 0,1,2,3 or cpu')
    parser.add_argument('--classes', nargs='+', type=int, help='filter by class')
    parser.add_argument('--agnostic-nms', action='store_true', help='class-agnostic NMS')
    parser.add_argument('--augment', default=False, help='augmented inference')
    opt = parser.parse_args()
    print(opt)  # 打印输入配置参数

    with torch.no_grad():
        detect(save_img=True)