前言
最近在做一个目标检测的任务,部署在边缘侧,对于模型的速度要求比较严格(yolov8n这种),所以模型的大小不能弄太大,所以原模型的性能受限,更多的重点放在增加数据上。实测yolov8x在数据集上的效果比小模型要好不少,所以想法是用yolov8x来预打标,然后选择一些置信度高的样本加到训练集来训练yolov8n,减少标注的成本。原始数据是在ceph上,比较直观的方式就是一张张读,然后一张张推理。这样效率不高,毕竟GPU适合组batch去推理,所以为了效率就需要自己去组成batch然后推理,然后再把batch的结果再分开对应到单张图上,虽然并不难,还是挺繁琐的,这也是我以前的做法。其实可以不需要这么麻烦,这种batching操作很多的推理服务都会帮我们做掉,我们只需要并发去请求就好了,和做单个没什么区别,要加其他的模型进行组合逻辑也是非常方便。GroundingDINO(一种开集目标检测算法)服务化,根据文本生成检测框_CodingInCV的博客-CSDN博客这个里面我们使用torchserve来实现了算法的服务化,这里我们依旧还是使用torchserve。基础就不做介绍了,可以读上面这篇。与GroundingDINO不同的是,这里我们会启用batch操作,而GroudingDINO里没有支持batch。
导出onnx模型
为了方便起见,我们使用onnx模型,避免去处理yolov8的pytorch环境问题,官网提供了导出的方式:Detect - Ultralytics YOLOv8 Docs
为了支持动态的batch, 我们导出时要以dynamic的方式导出,我这里对导出做了一点修改,只让batch为动态,而输入尺寸固定, 修改engine/exporter.py:
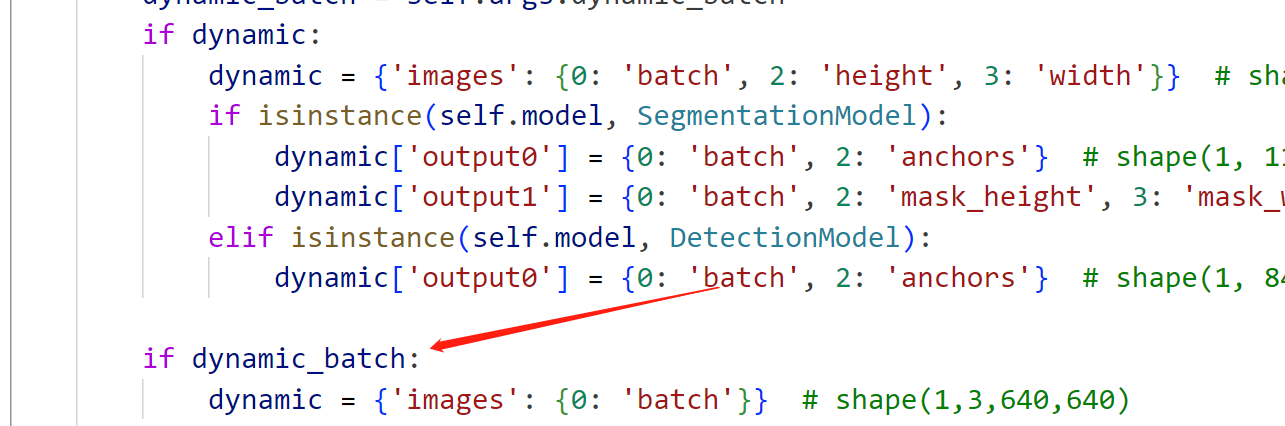
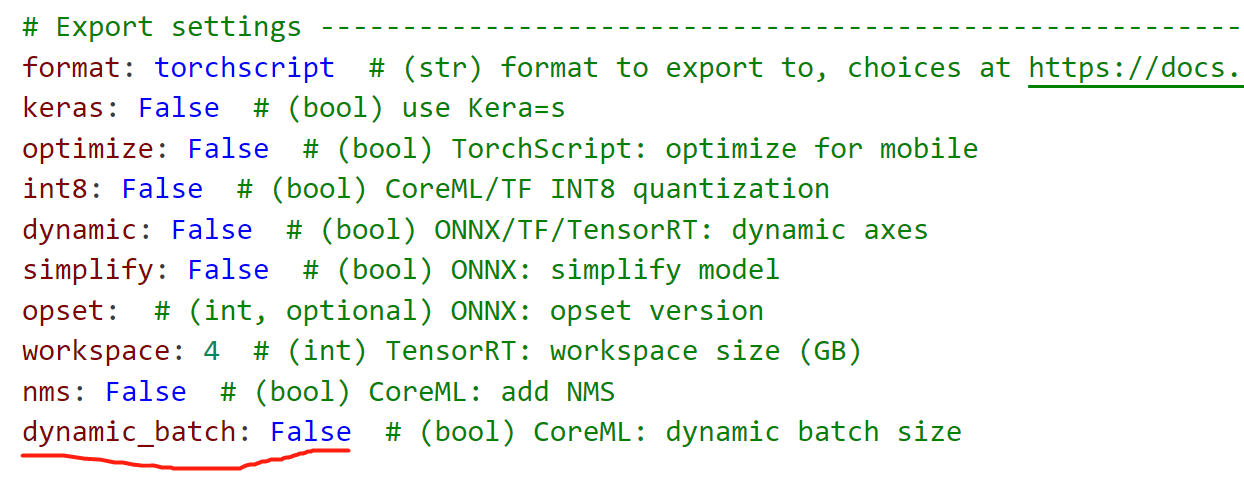
为了支持我们新增的dynamic_batch参数,我们还需要再default.yaml中增加这个参数,具体可以参考:yolov8训练进阶:新增配置参数_CodingInCV的博客-CSDN博客
然后自行写脚本转换:
from ultralytics import YOLO

model = YOLO('yolov8x6404/weights/last.pt')  # initialize
model.export(format = "onnx", opset = 11, simplify = True,
             dynamic_batch=True, imgsz=640)  # export to onnx
导出的模型将和输入的模型在同一个路径。
自定义handler
handler的写法
在GroundingDINO(一种开集目标检测算法)服务化,根据文本生成检测框_CodingInCV的博客-CSDN博客我们没有提到怎么写自己的模型handler,所谓模型handler就是告诉torchserve我们的模型如何载入、前处理和后处理。官方教程:Custom Service — PyTorch/Serve master documentation
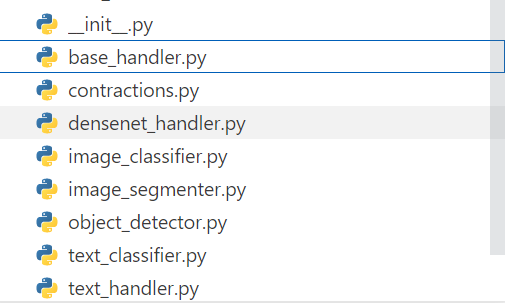
torchserve自身带了一些handler:
BaseHandler: handler的基类,我们可以继承这个,也可以不继承,如果不继承则至少要实现initialize和handle方法。
我们可以继承他们来实现自己的,也可以不继承,这里以不继承来实现,通用性比较强,不管什么模型都可以搞定,主要就是实现一个类,这个类至少要实现initialize和handle方法:
initialize 就是初始化模型,这个方法必须有一个输入参数context(serve/ts/context.py at master · pytorch/serve (github.com)), 从这个参数我们可以拿到比如模型的路径、显卡号等信息。
handle 是接收输入请求和返回处理结果的接口,具有2个参数,第一个参数是输入请求,第二个参数也是context。
对于每个模型我们可以将推理过程拆分为三个过程(方法):preprocess、inference、postprocess,即前处理、推理、后处理,我们的handler只要实现这三个方法,然后依次在handle中调用即可,最后把输出按要求组合起来,handle的返回值必须是list of list,也就是数组的数组,外层list的长度等于输入的batch数(torchserve可以自动组batch),内层的list是单个请求的输出,里面的元素可以是dict,完整代码如下:
import logging
import os,sys
import onnxruntime as ort
import base64
import numpy as np
sys.path.append(os.path.dirname(os.path.dirname(os.path.abspath(__file__))))
try:
    from common.common import resize_image
except:
    from common import resize_image
import cv2

logger = logging.getLogger(__name__)
console_logger = logging.StreamHandler(sys.stdout)
console_logger.setLevel(logging.DEBUG)
console_logger.setFormatter(logging.Formatter("%(asctime)s %(name)s [%(levelname)s] %(message)s"))
logger.addHandler(console_logger)

class YOLOV8Handler(object):
    def __init__(self):
        self.context = None
        self.initialized = False
        self.model = None
        self.input_name = None
        self.input_shape = None
        self.conf_thres = 0.45
        self.iou_thres = 0.45
        self.class2label = {
            0: "body",
            1: "head",
        }
        self.device = None

    def initialize(self, context):
        #  load the model
        logger.info("initialize grounding dino handler")
        self.context = context
        self.manifest = context.manifest
        properties = context.system_properties
        model_dir = properties.get("model_dir")

        # Read model serialize/pt file
        serialized_file = self.manifest['model']['serializedFile']
        model_pt_path = os.path.join(model_dir, serialized_file)
        if not os.path.isfile(model_pt_path):
            raise RuntimeError("Missing the model file")

        # get device

        available_providers =  ort.get_available_providers()
        provide_options = {}
        if "CUDAExecutionProvider" in available_providers:
            self.device = str(properties.get("gpu_id"))
            provide_options["device_id"] = self.device
            privider = "CUDAExecutionProvider"
            logger.info("using gpu {}".format(self.device))
        else:
            privider = "CPUExecutionProvider"

        self.model = ort.InferenceSession(model_pt_path, providers=[privider], provider_options=[provide_options])
        self.initialized = True
        # get input shape
        self.input_name = self.model.get_inputs()[0].name
        self.input_shape = self.model.get_inputs()[0].shape
        logger.info("model loaded successfully")

    def preprocess(self, data):
        logger.info("preprocess data")
        preprocessed_data = []
        preprocessed_params = []
        network_input_height = self.input_shape[2]
        network_input_width = self.input_shape[3]
        for row in data:
            input = row.get("data") or row.get("body")
            if isinstance(input, dict) and "image" in input:
                image = input["image"]
            else:
                logger.error("No image found in the request")
                assert False, "No  image found in the request"
            if isinstance(image, str):
                # if the image is a string of bytesarray.
                image = base64.b64decode(image)
            # If the image is sent as bytesarray
            if isinstance(image, (bytearray, bytes)):
                image = cv2.imdecode(np.frombuffer(image, dtype=np.uint8), cv2.IMREAD_ANYCOLOR)
            else:
                logger.error("No caption or image found in the request")
                assert False, "No caption or image found in the request"

            image_h, image_w, _ = image.shape
            image, newh, neww, top, left  = resize_image(image, keep_ratio=True, dst_width=network_input_width, dst_height=network_input_height)
            image = cv2.cvtColor(image, cv2.COLOR_BGR2RGB)
            preprocessed_data.append(image)
            preprocessed_params.append((newh, neww, top, left, image_h, image_w))
        logger.info("preprocess data done")
        preprocessed_data = np.array(preprocessed_data).astype(np.float32)
        preprocessed_data /= 255.0
        preprocessed_data = np.transpose(preprocessed_data, (0, 3, 1, 2))
        return preprocessed_data, preprocessed_params

    def inference(self, data, *args, **kwargs):
        logger.info("inference data")
        outputs = self.model.run(None, {self.input_name: data})
        return outputs[0]

    def postprocess_one(self, output, request_param):
        newh, neww, top, left, image_h, image_w = request_param
        x_factor = image_w / neww
        y_factor = image_h / newh
        outputs = output
        outputs = np.transpose(np.squeeze(outputs))
        boxes = {}
        for row in outputs:
            classes_scores = row[4:]
            max_score = np.max(classes_scores)
            if max_score < self.conf_thres:
                continue
            class_id = np.argmax(classes_scores)
            x, y, w, h = row[0], row[1], row[2], row[3]

            # Calculate the scaled coordinates of the bounding box
            x1 = x - w / 2
            y1 = y - h / 2
            x1 = x1-left
            y1 = y1-top
            x2 = x1 + w
            y2 = y1 + h

            # Scale the coordinates according to the original image
            x1 = x1 * x_factor
            y1 = y1 * y_factor
            x2 = x2 * x_factor
            y2 = y2 * y_factor
            if class_id not in boxes:
                boxes[class_id] = [[],[]]
            boxes[class_id][0].append([x1, y1, x2, y2])
            boxes[class_id][1].append(float(max_score))

        # NMS
        nms_boxes = []
        for class_id in boxes:
            candidate_boxes, scores = boxes[class_id]
            indices = cv2.dnn.NMSBoxes(candidate_boxes, scores, self.conf_thres, self.iou_thres)
            for index in indices:
                nms_boxes.append((candidate_boxes[index], scores[index], self.class2label[class_id]))
        return nms_boxes

    def postprocess(self, data):
        outputs, request_params = data
        boxes = []
        for i in range(len(outputs)):
            output = outputs[i]
            request_param = request_params[i]
            nms_boxes = self.postprocess_one(output, request_param)
            boxes.append(nms_boxes)

        return boxes

    def handle(self, data, context):
        self.context = context
        image, request_params = self.preprocess(data)
        outputs = self.inference(image)
        boxes_batch = self.postprocess((outputs, request_params))
        results = []
        for boxes in boxes_batch:
            ret = []
            for box, score, label in boxes:
                ret.append({"box": box, "score": score, "label": label})
            results.append(ret)
        return results
注意:为了实现batch操作,我们实现的接口都应该是对batch来的,而不是只对一张图。
调试handler
我们可以模仿context的内容来初始化handler, 然后调用handle方法来调试结果是否正常。
if __name__=="__main__":
    import addict
    context = addict.Dict()
    context.system_properties = {
        "gpu_id": 0,
        "model_dir": "./weights"

    }
    context.manifest = {
        "model": {
            "serializedFile": "yolov8x.onnx"
        }
        }
    handler = YOLOV8Handler()
    handler.initialize(context)
    image_path = "./body.png"
    with open(image_path, "rb") as f:
        image = f.read()

    data = [
        {
            "data": {
                "image": image
            }
        },
        {
            "data": {
                "image": image
            }
        }
    ]

    outputs = handler.handle(data, context)
    print(outputs)
镜像制作
在GroundingDINO(一种开集目标检测算法)服务化,根据文本生成检测框_CodingInCV的博客-CSDN博客中镜像的基础上安装onnxruntime-gpu, 或者在启动时安装
转换模型
这个操作和上一篇文章一样,只是权重文件和需要handler修改一下,不赘述:
docker run --rm -it -v $(pwd):/data -w /data torchserve:groundingdino bash -c "torch-model-archiver --model-name yolov8x --version 1.0 --serialized-file weights/yolov8x.onnx --handler yolov8/yolov8_handler.py --extra-files common/*.py"
启动服务
与上一篇服务化不同,我们启动时不载入所有模型,而是通过post接口去开启,方便设置模型的batch size, 其中端口号根据需要设置。
docker run -d --name groundingdino -v $(pwd)/model_store:/model_store -p 8080:8080 -p 8081:8081 -p 8082:8082 torchserve:groundingdino bash -c "pip install onnxruntime-gpu && torchserve --start --foreground --model-store /model_store
使用Management API载入模型
Management API — PyTorch/Serve master documentation
可以用curl也可以用postman, 如
curl -X POST "localhost:8081/models?url=yolov8x.mar&batch_size=8&max_batch_delay=50"
如果需要再修改batchsize, 要先调用卸载模型的接口写在,然后再调用上面的接口。
通过上面的操作,torchserve会帮我们组batch, 最大为8.
调用
import json
import base64
import requests
import threadpool

url = "http://localhost:8080/predictions/yolov8x"
headers = {"Content-Type": "application/json"}

def request_worker(arg):
    image_path = "./b03492798d5b44eeb70856b9253386df.jpeg"
    data = {
        "image": base64.b64encode(open(image_path, "rb").read()).decode("utf-8")
    }

    response = requests.post(url, headers=headers, json=data)
    print(response.text)

if __name__ == "__main__":
    pool = threadpool.ThreadPool(24)
    requests_task = threadpool.makeRequests(request_worker, range(100))
    [pool.putRequest(req) for req in requests_task]
    pool.wait()
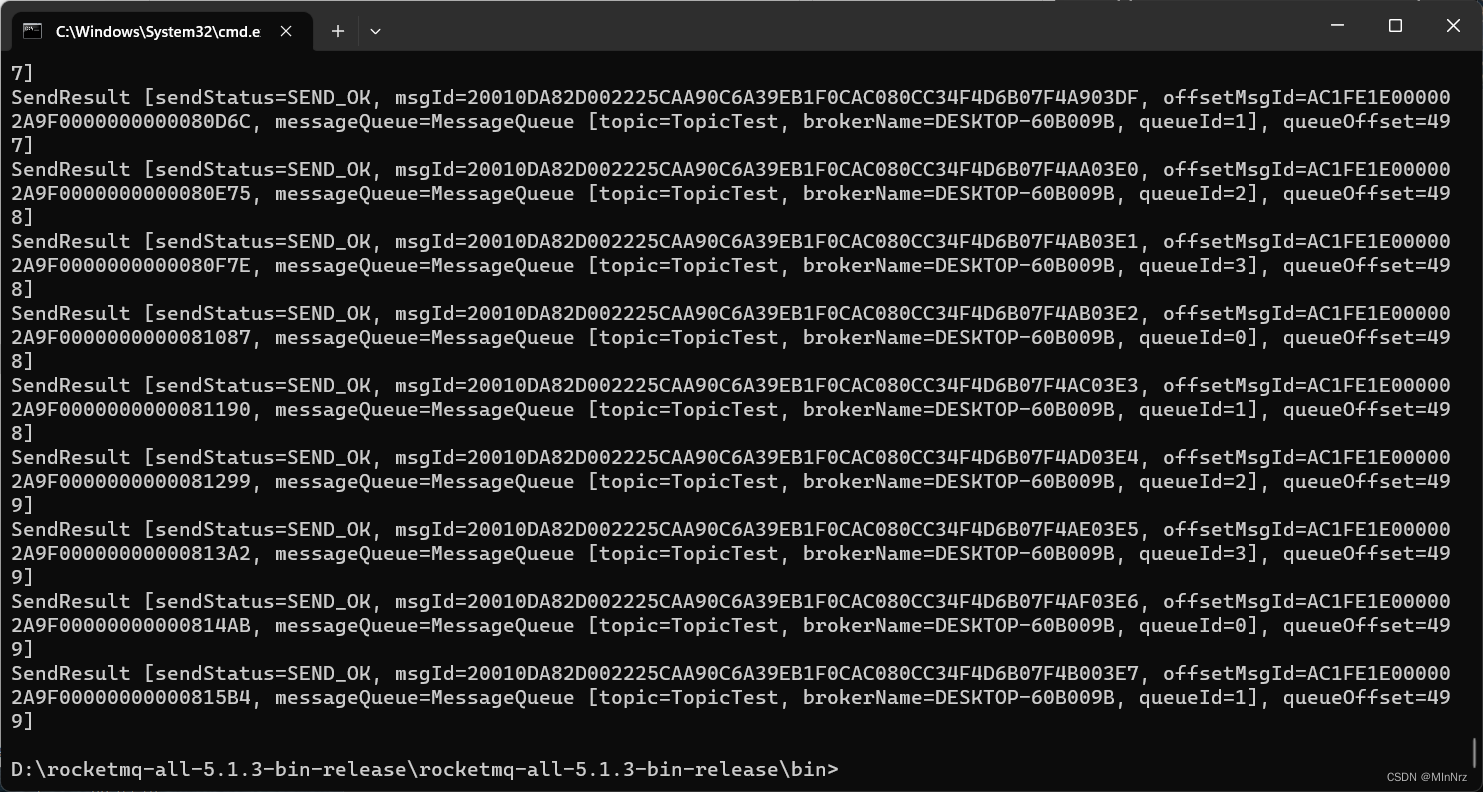
这里,我们用多线程模仿了高并发的去调用模型,这样torchserve就可以自动的根据负载情况来组成batch了,提高模型的吞吐量。类似的,我们就可以方便的使用多线程去读取数据然后调用模型来得到预打标的结果,而不用去处理模型的依赖、组batch等逻辑,也可以很方便的提供给其他需要的同事来使用。
结语
本文简述了将yolov8服务化的过程,服务化后,我们可以方便的用模型来进行数据的预打标、分享模型给他人使用。